Difference between revisions of "Graphical Remote Login with xrdp"
(→Set the window manager (Linux, macOS, Windows 10)) |
(→Connect using remmina (Linux, (macOS))) |
||
| Line 31: | Line 31: | ||
If it is not already installed on your system, install the xrdp client remmina (sudo apt-get install remmina). Other clients like vinagre should work to. | If it is not already installed on your system, install the xrdp client remmina (sudo apt-get install remmina). Other clients like vinagre should work to. | ||
| − | Before you can connect with remmina, you need to establish a vpn | + | Before you can connect with remmina, you need to establish a vpn connection to the ITP or establish an ssh-tunnel (see further below). |
Open remmina. | Open remmina. | ||
| Line 40: | Line 40: | ||
In the new window choose a 'Name' for your connection and in the line 'Server' you need to enter 'zeta'. | In the new window choose a 'Name' for your connection and in the line 'Server' you need to enter 'zeta'. | ||
| − | Choose a custom resolution. | + | Choose a custom resolution. You can also use the resolution of your client, but the performance decreases with very high resolutions. |
[[File:Remmina2.png|center]] | [[File:Remmina2.png|center]] | ||
| Line 48: | Line 48: | ||
[[File:Remmina3.png|center]] | [[File:Remmina3.png|center]] | ||
| − | After saving your setting, should have a new entry in your remmina main screen. Double click on this new entry | + | After saving your setting, you should have a new entry in your remmina main screen. Double click on this new entry to establish the xrdp connection. |
[[File:Remmina4.png|center]] | [[File:Remmina4.png|center]] | ||
| Line 56: | Line 56: | ||
[[File:Remmina5.png|center]] | [[File:Remmina5.png|center]] | ||
| − | Now you can log into a graphical session running on the login server zeta. This normally start a gnome session. If you want another window manager please read the corresponding section on this page | + | Now you can log into a graphical session running on the login server zeta. This normally start a gnome session. If you want another window manager please read the corresponding section on this page above. |
==Connect with Windows 10 == | ==Connect with Windows 10 == | ||
Revision as of 10:54, 23 March 2020
Attention!! This article is still in progress!
If you are using a Linux desktop system or Windows 10, then you can remotely login into a Linux session on our main login server zeta. For macOS this should work similar to Linux, but is not tested.
To use this service you either need to connect to the ITP VPN or need to establish a ssh-tunnel.
How to use the ITP VPN with openvpn is described here [1] and with Networkmanager here [2].
We first describe the settings needed if the ITP VPN is used. A description for ssh-tunnel is further below. If you use a Linux operating system or macOS and did not already configure the ITP VPN, the configuration with ssh-tunnel is shorter.
If you disconnect from a xrdp session (on purpose or by a network error), you can reconnect to the same session in the next 24 hours. To completely end a session you need to log out inside of your xrdp session instead of interrupting the connection. All session, which are not connected for over 24 hours, are automatically terminated.
Contents
Set the window manager (Linux, macOS, Windows 10)
You can skip this section if you want gnome as your window manager of your remote login session.
The window manager cannot be set by a menu. Instead it is set bin the content of the file '.xsession' in your home directory of your ITP account. Most likely this file does not exist in your account. If you connect to xrdp without this file in your home directory, then (before starting the window manager) this file is created such that gnome is started as window manager.
You can manually override your '.xsession' to choose another window manager. Here is a list of supported window managers and which needs to be the content of the '.xsession':
gnome: gnome-session
kde: startkde
xfce: xfce4-session
lxsession: lxsession -s LXDE -e LXDE
Connect using remmina (Linux, (macOS))
If it is not already installed on your system, install the xrdp client remmina (sudo apt-get install remmina). Other clients like vinagre should work to.
Before you can connect with remmina, you need to establish a vpn connection to the ITP or establish an ssh-tunnel (see further below).
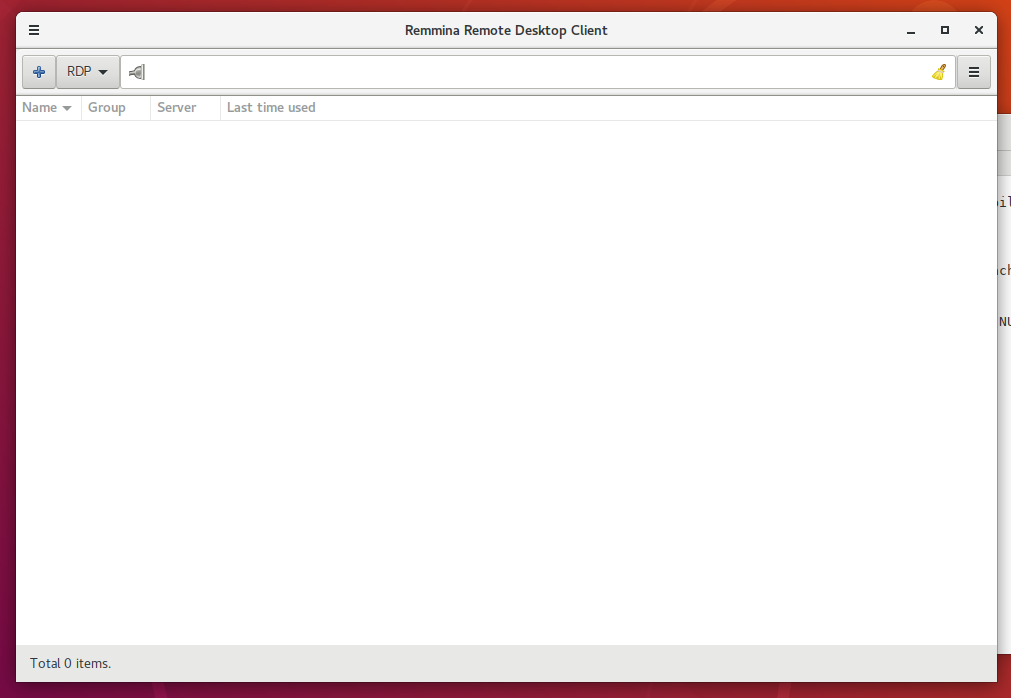
Open remmina.
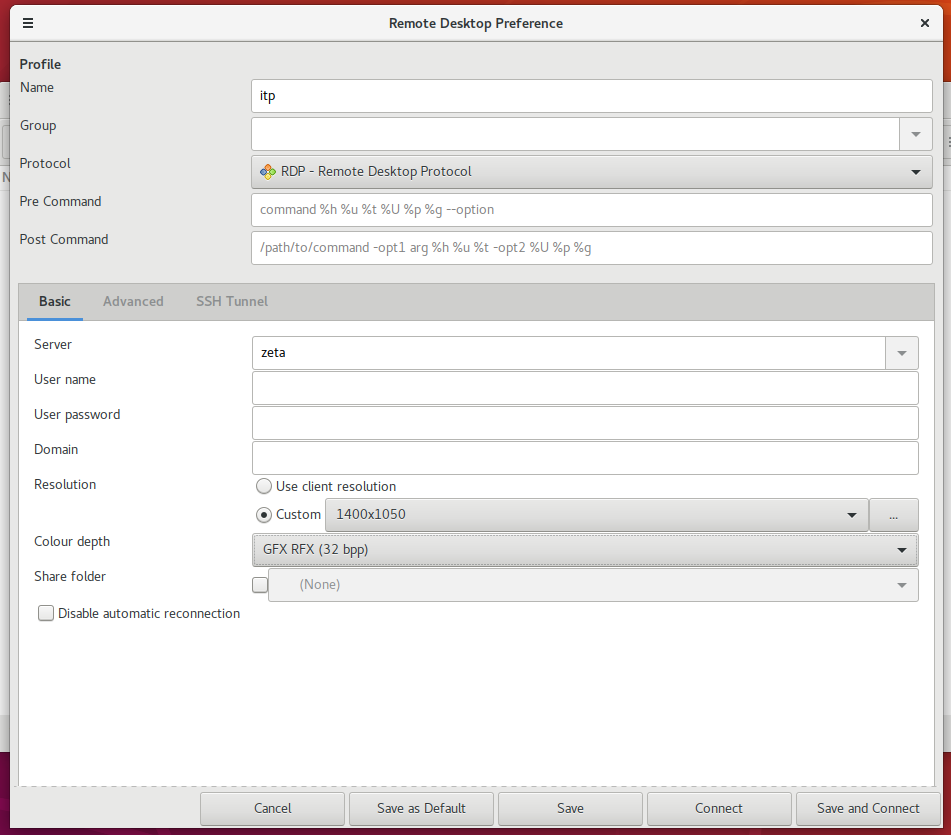
In remmina do not directly connect, as the connection does not work with the standard settings. Instead click on the plus sign in the upper left corner to set a new connection.
In the new window choose a 'Name' for your connection and in the line 'Server' you need to enter 'zeta'. Choose a custom resolution. You can also use the resolution of your client, but the performance decreases with very high resolutions.
In the section 'Colour depth' you need to choose another entry. The options 'GFX AVC444' and 'GFX AVC420' do not work. Choose one of the other options.
After saving your setting, you should have a new entry in your remmina main screen. Double click on this new entry to establish the xrdp connection.
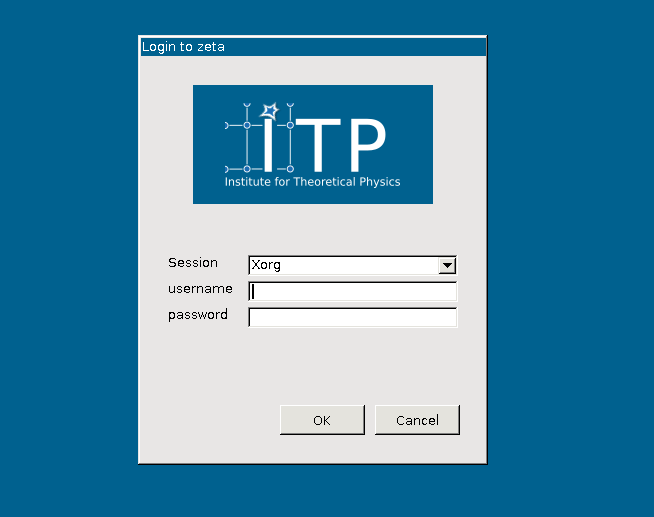
After a few seconds you should get the following login screen.
Now you can log into a graphical session running on the login server zeta. This normally start a gnome session. If you want another window manager please read the corresponding section on this page above.
Connect with Windows 10
Also for Windows 10 you need first to establish a connection to the itp-vpn.
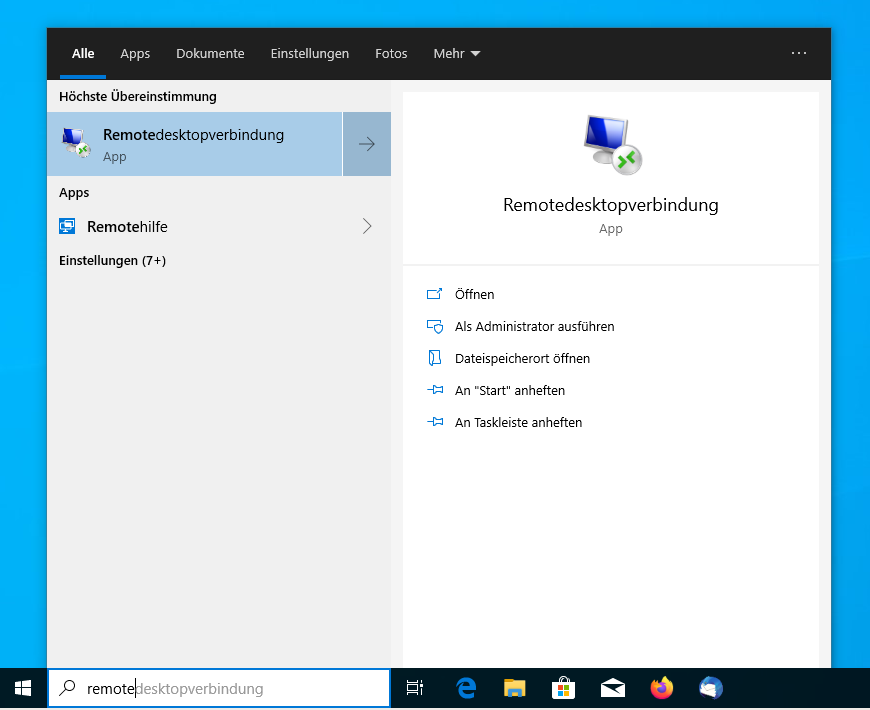
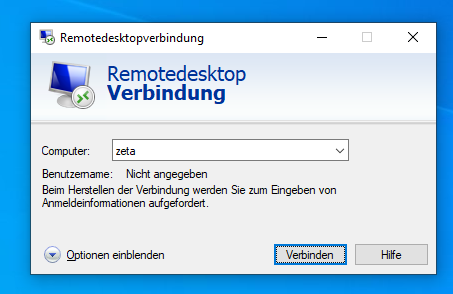
The rest is very simple. In the window search menu search for 'remote'. In a german Window 10 you start the 'Remotedesktopverbindung' app. In english this should also begin with 'Remote desktop'.
In the next window enter 'zeta' as server. Under options you can change various things as the wanted resolution. But the standard setting also work.
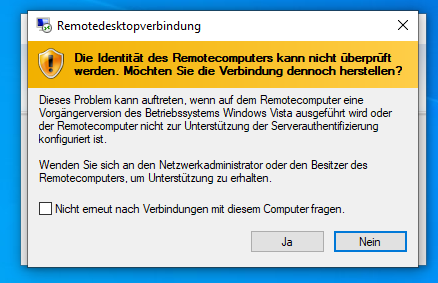
You can click yes in the next window.
Now you should get a login screen where you can log in with your itp account (see the Linux section for a picture).
SSH-Tunnel instead of VPN
Instead of VPN you can also tunnel port 3398 to establish a connection to the xrpd server.
Terminal based ssh-tunnel
Just open a terminal and enter 'ssh -L 3389:localhost:3389 yourusername@itp.uni-frankfurt.de', where 'yourusername' needs to be replaced by your itp username. After a successful connection, do not close the terminal as else the ssh-tunnel is closed. In your client software (e.g. remmina) use as server 'localhost' instead of 'zeta'.
ssh-tunnel in remmina
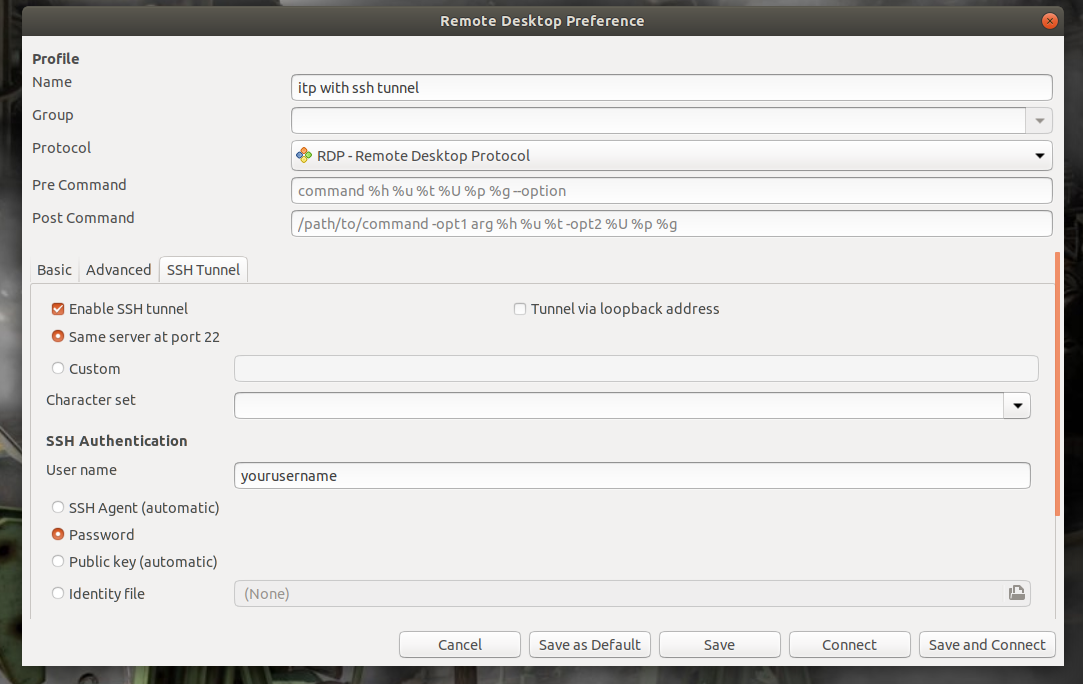
Instead of using the itp vpn, you can add an ssh-tunnel directly in remmina. For this first change the server from 'zeta' to 'zeta.itp.uni-frankfurt.de'.
Then in the connection menu switch to the tab 'SSH Tunnel'. Check the box 'Enable SSH tunnel', check 'Same server at port 22', enter your itp username at 'User name' and check 'Password'. Now, before connecting to xrdp, a ssh-tunnel is established where you need to enter your itp password. If you use ssh-keys to establish connection, you need to change the authentication method.
Putty
If you use a ssh-tunnel with Putty, then change in your client software (e.g. remmina) the server 'zeta' to 'localhost'.
Install Putty through your software manager or for Windows go to https://www.putty.org/ follow the link and download and install Putty.
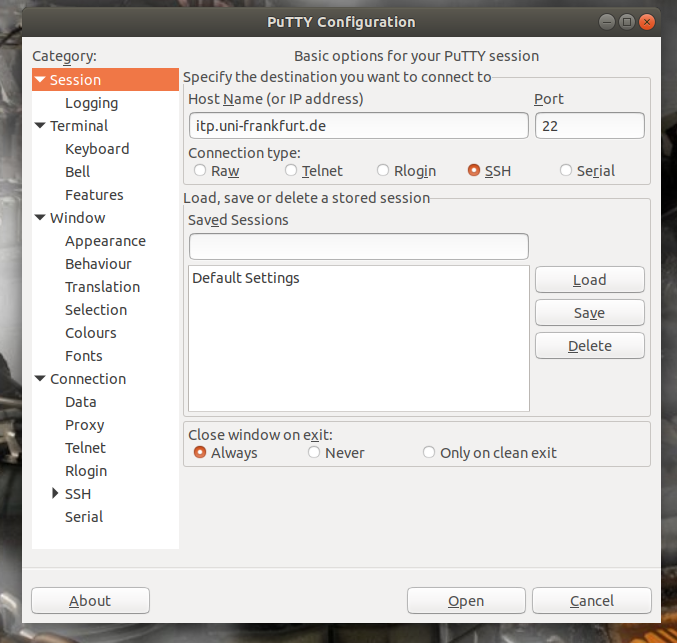
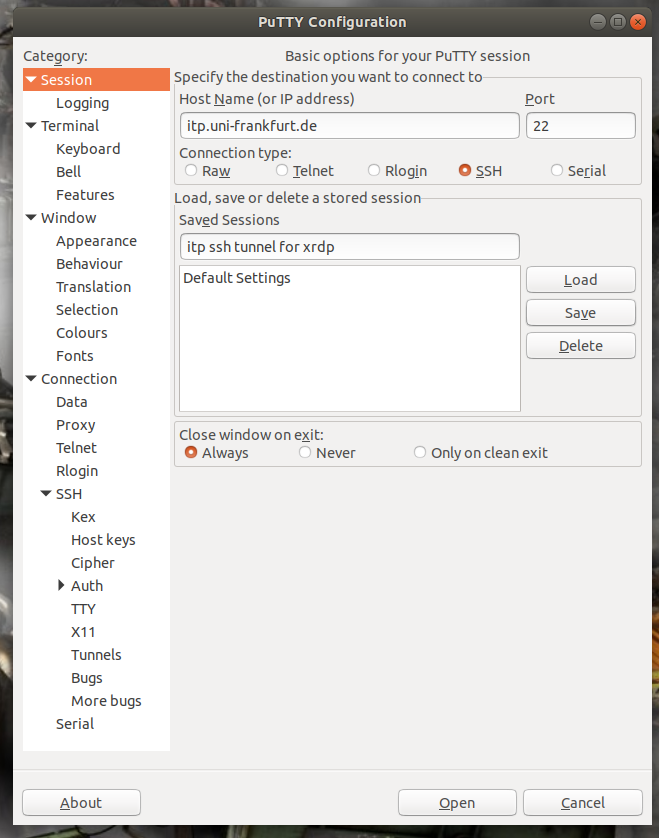
After opening Putty enter 'itp.uni-frankfurt.de' in the 'Host Name (or IP address)' field.
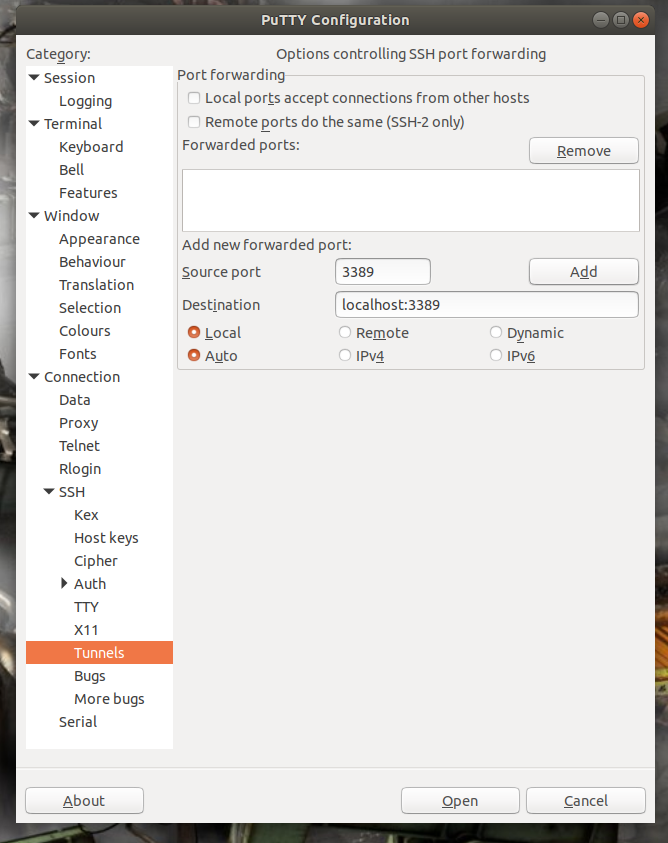
On the left side extend at the bottom the menu 'SSH' and go to the submenu 'Tunnels'. Add '3389' as 'Source port' and 'localhost:3389 as 'Destination'. Then click on 'Add'.
Go back back to the previous menu by clicking on 'Session' in the upper left corner. Under 'Saved Sessions' choose a session name of your liking and click on 'Save'. Later you can reload your settings by selecting the session name and clicking on 'Load'.
To establish your connection click on 'Open'.
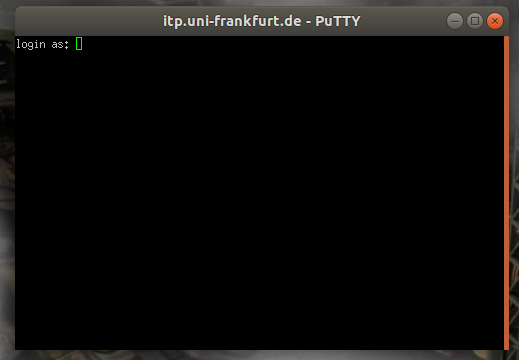
You should get a login screen for your ssh-tunnel where you log in with your itp account. If you close this window, the ssh-tunnel is terminated.
Now start your client for the xrdp connection (remember to change 'zeta' to 'localhost' in your client settings).
